Go directly to the table of contents
The „Sit In“ is a fundamental trick in aggressive inline skating that beginners should definitely learn.
Many beginners are hesitant to ride down a bank or pipe and use the classic „Drop In“. While the Drop In is technically easier, it requires more courage than the Sit In. That’s why the Drop In is the better option for some, while for others the Sit In is the right choice.
With the Sit In, you sit lower. This makes the ramp seem less high, and going down becomes mentally easier. In addition, the potential fall height is lower, which reduces the risk of injury. The Sit In is therefore a safe way to roll down your first ramps and pipes while building confidence for more advanced tricks. If the Sit In goes wrong and you slip, it feels more like sliding down a slide than taking a hard fall, especially if you’re wearing crash pants.
During the Sit In, you sit on the ramp or inside the pipe and start rolling from a seated position. This keeps both the fall height and mental barrier relatively low.
The Sit In is also ideal for advanced skaters and pros: after a failed stall or grind, you can quickly get back into the pipe, pick up speed, and continue skating right away.
Sit In – SkaMiDan Trick Clip
Before we start with the detailed tutorial, you can watch a short trick clip below. In it, we show you the Sit In from different perspectives and in slow motion. This way, you can either learn the trick on your own – or master it step by step with the help of our detailed video tutorial or our comprehensive blog post.
Table of contents
- Video tutorial
- Recommended protectors
- Body posture while skating – Ramps, Banks and Pipes
- The correct footwork – pull skates upwards
- The correct push-off
- Overcoming fear – falling on purpose
- The final Sit In – focus and execution
- Behind the scenes - shooting day and impressions
The sit-in – practical in a wide variety of situations in the skatepark
1. Sit In – Detailed Video Tutorial
In our detailed video tutorial on the Sit In, we show you step by step how to learn this trick correctly from the very beginning while overcoming possible mental hurdles.
We also take a look at the prior knowledge you should ideally have and explain the advantages the Sit In offers you and in which situations it can be used particularly effectively.
This video serves as a placeholder. The detailed video tutorial will be added soon.
2. Recommended protectors
As with any trick in the skatepark, we recommend that you wear appropriate protective gear.
For the Sit In, you don’t need the full set of protective equipment, but you should definitely wear a skate helmet or stunt helmet. In addition to wearing a skate helmet, we also recommend using additional protective gear.
 Protective Pants – Ennui BLVD Chrash Pants
The right protective gear not only protects you from injuries but also boosts your confidence and takes away some of the fear.
For the Sit In, we especially recommend the following pads:
- Helmet (essential)
- Wrist guards
- Elbow pads
- Knee pads
- Padded shorts / crash pants
These are exactly the protectors we use ourselves in our „Learn the Sit In“ tutorial.
3. Body posture while skating – Ramps, Banks and Pipes
The body posture and foot position for the Sit In are very similar to the optimal stance – the proper posture – used in regular inline skating. This also applies in general to skating on ramps and pipes.
To maintain the best possible balance on your inline skates, it’s important to adopt a slight scissor stance with your feet. Just imagine someone is about to push you, and you need to position yourself so that you stay standing securely.
 Body posture when skating in the skatepark
Make sure that one skate is positioned slightly in front of the other so that the back wheel of the front skate is roughly aligned with the front wheel of the rear skate (slightly offset). Side-to-side, your feet should be close together – just as you would stand in regular shoes, at most hip-width apart.
Your knees and shoulders should be pushed forward far enough that you could draw a straight, vertical line from your shoulders through your knees down to your toes.
It’s also important that when you bend your knees, you push them forward instead of sticking your butt back. Your butt should stay roughly above your heels, and your legs should form an arrow pointing forward.
We maintain this posture not only when skating normally in the skatepark, but also when going up and down ramps and pipes – and of course during and immediately after the Sit In.
 Body posture when riding over edges
The exercise at this stage is to skate up various ramps and pipes as far as possible – not necessarily all the way to the top—without letting your feet pull together side by side or losing the posture we just explained.
When skating down a ramp and rolling over the edge, you should shift your weight slightly more toward the back part of your feet.
When skating up a ramp and rolling over the edge, the same applies: again, shift the weight slightly backward (note: only the weight inside your feet, your body weight should always remain forward, not leaning back).
This ensures that you glide smoothly and in control over the edge without getting caught on it.
4. The correct footwork – pull the skates upwards
The most difficult part of learning new basics is usually getting the body posture right. That’s why we recommend practicing it intensively and mastering it securely before moving on to the next step.
In the next step, we’ll focus on an exercise that is essential for performing the Sit In. To avoid tipping backward during the Sit In, it’s important to pull your feet up toward yourself as much as possible.
 Daniel Lott – Sitting on a Funbox
Sit down on the ramp or pipe of your choice. Technically, the Sit In becomes easier the higher and steeper the ramp is – but for your mind and the initial overcoming of fear, it’s usually easier to start on a smaller ramp.
Once you’ve found a suitable ramp, begin by alternately pulling your left and right skate upward. The goal is to pull each skate as close to yourself as possible so that the back wheel of the skate is as close to the coping as possible. The term “coping” refers to the bar or edge where the downward surface of the ramp (bank) transitions into the upper surface of the ramp (table).
 Sit In – Pulling up one skate
 Sit In – Pulling up one skate
The further we can pull our feet or skates upward, the easier the Sit In will be later. A small note: when pulling the skates up, only the back wheel needs to touch the ground or the ramp (bank/pipe). Having the front wheels touch the ground as well is technically impossible and also not necessary.
After performing the exercise alternately with the left and right foot, the next step is to pull both skates upward at the same time.
 Sit In – Pull up both skates
The same applies here: the higher you can lift your skates, the better.
5. The correct push-off
The next step to being able to perform the Sit In correctly is to lift your skates while bringing your upper body upward at the same time.
The goal is to pull your feet or inline skates toward yourself as much as possible. With the following exercises, you will be able to do this even more effectively and with better control.
5.1 Raising your hips
To be able to bring your upper body further upward, you need to lift your hips – and that is exactly what the next exercise is about.
 Lifting your hips and upper body
 Lifting your hips and upper body
To lift your hips, and with them your upper body, support yourself with your hands and actively push yourself upward.
Ideally, your fingertips should point forward while pushing off so that during the final Sit In you can push yourself from back to front. Depending on the type of wrist guards you wear, this position may not always be possible, at least not without pressure points or discomfort.
If your wrist guards press uncomfortably into your hands, simply rotate your hands outward so that the fingers of your right hand point to the right and the fingers of your left hand point to the left.
The farther and more powerfully you can push yourself upward, the better. If at first you can only lift your hips a small amount, repeat this exercise until you can raise them to about the height of your elbows.
Once you’ve achieved this, you can move on to the final exercise: the correct movement sequence.
5.2 Bring your body and inline skates to a higher position
By the correct movement sequence, we mean that for the Sit In you need to be able to lift your hips and upper body upward while simultaneously pulling your feet or skates up toward the coping.
 Hips and skates upward
 Hips and skates upward
The rule here is: the higher we lift our hips, the closer we can pull our skates, and therefore our heels, toward ourselves.
This is why the final exercise before the actual Sit In is to be able to perform both movements, which we previously practiced separately, at the same time.
So we lift our hips upward while simultaneously pulling our skates or heels toward ourselves, or up the ramp.
6. Overcoming fear – falling on purpose
At this point, we already know, can perform, and meet all the requirements needed for the Sit In.
The only thing that can still keep us from completing the final Sit In is our fear – on the one hand, the fear of falling forward, and on the other hand, the fear of falling backward.
However, we can immediately take away your fear of falling forward: physically, it is practically impossible unless you intentionally try to dive headfirst. And even then, it would be more difficult than the Sit In itself.
 Falling on purpose – Sit In
With the Sit In, the only real risk is falling backward. However, due to the low fall height, this is hardly painful even without protective gear – it feels more like landing on your butt on a water slide with a bit too much speed.
But since we are wearing protective gear, and ideally padded shorts or crash pants, this won’t cause any harm at all.
Still, the fear often remains – triggered by the idea of the fall.
 Falling on purpose – Sit In
 Falling on purpose – Sit In
That’s why we simply sit down on the ramp we want to use and slide down. With each slide, we jump a little further in or let ourselves fall slightly more onto our butt. This way, we gradually feel and learn that it is absolutely harmless.
And at that point, we are ready for the final Sit In.
7. The final Sit In – focus and execution
Now that we know nothing can happen to us in the event of a fall, we are ready for the final Sit In.
To safely ride down a bank or pipe using the Sit In without tipping backward, we simply need to apply what we learned in the previous steps – and pay attention to two small additional points:
- sit down on the ramp or pipe,
- lift your hips and upper body and actively push upward,
- pull your skates up as far as possible, ideally until the back wheels almost touch the coping.
It is important that we perform all these movements simultaneously and that we consciously lean our upper body far forward when starting the Sit In.
As soon as we shift our upper body forward, our feet automatically tilt downward slightly, causing not only the back wheels but also the front wheels to make contact with the ramp or pipe.
 Sit In – the final execution
To make sure the forward lean works well, we shouldn’t look straight ahead. Instead, we focus on the surface of the bank or pipe we want to ride down. So we look down into the ramp. This automatically makes us lean further forward – which in turn prevents us from losing our balance backward during the descent.
Once we feel ready to perform the Sit In fully, we repeat it as often as possible until we feel increasingly comfortable and the movement becomes easier and more natural.
Finally, we practice the Sit In on as many different ramps and pipes as possible.
You’ll quickly notice that it’s actually easier on higher and steeper ramps, as it requires less effort to pull your feet or skates toward your body.
 Sit In – the final execution
 Sit In – the final execution
The more different ramps we master with the Sit In, the more confident we become – and the less fear we have of new situations or unfamiliar ramps.
8. Behind the Scenes - Shooting Day and Impressions
We filmed and photographed the material for the blog and the video tutorial on a sunny October day in 2025.
 Daniel Lott – Skate park Weil am Rhein, Germany
On this day, temperatures were around 10 °C. However, thanks to the sunshine, it felt much warmer – even wearing just a T-shirt was pleasantly warm without moving.
At the skatepark in Weil am Rhein (Germany), colorful autumn leaves were scattered everywhere, creating an idyllic and atmospheric backdrop.
 Leaves in the skate park – Weil am Rhein
On the way there, it was still quite chilly: Wladi rode on his Powerslide Doop inline skates, and I (Daniel) followed by bike, carrying all the equipment for the filming day.
For the shoot, I (Daniel) used the following skating gear:
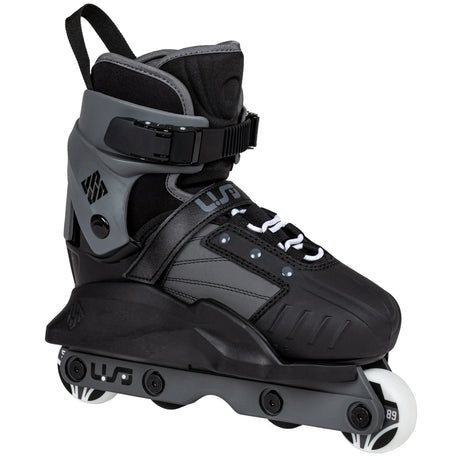
- USD Aeon 60 Sam Crofts Pro Aggressive Inline Skates
- MyFit Footies Low Cut 3 mm
- MyFit Skating Socks
- TSG Meta Skate Helmet
- Ennui Ave Elbow Gaskets
- Ennui Ave Knee Gaskets
- Ennui City Wrist Brace
- Ennui BLVD Crash Pants
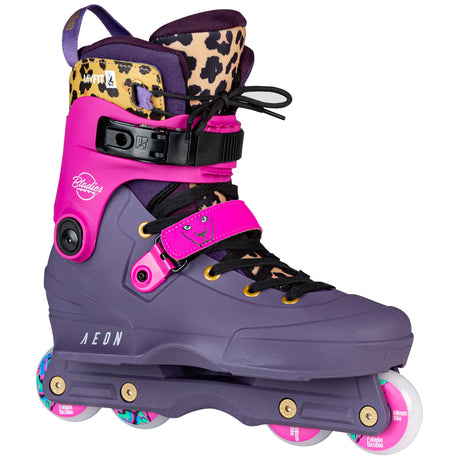
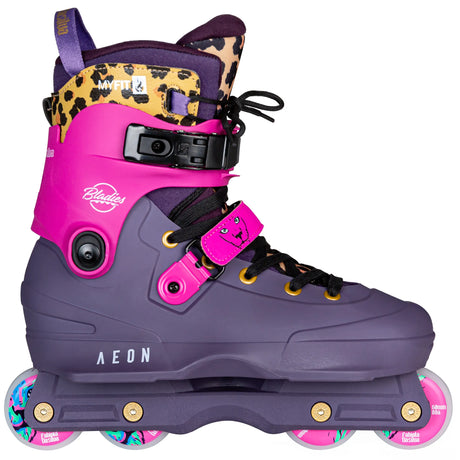
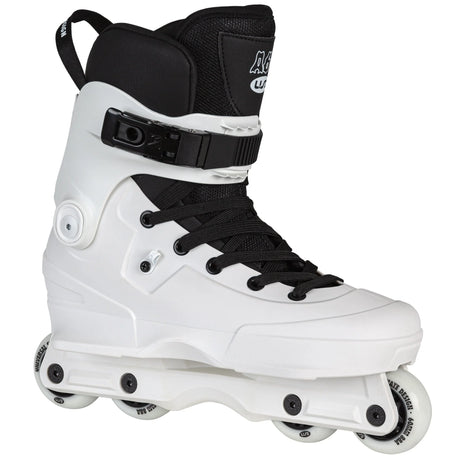
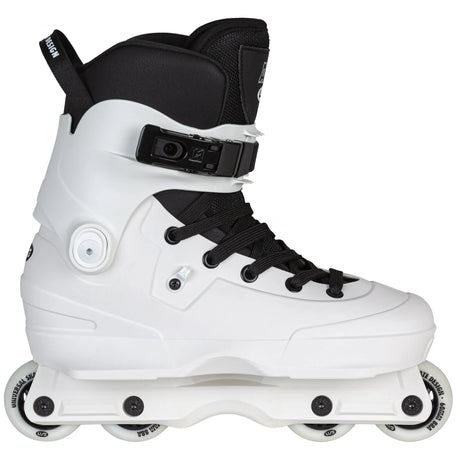
 USD Aeon 60 Pro Sam Crofts – Aggressive inline skates
 Protective gear
First, we wiped the remaining dew and rainwater out of the ramps, put on our skating gear, and prepared the camera equipment.
 Daniel Lott – Skate park Weil am Rhein, Germany
After that, we filmed one chapter after another and directly captured all the corresponding video and photo material. Finally, we recorded the intros.
In total, we spent about five hours in the skatepark, making the most of the beautiful weather.
 Daniel Lott – Skate park Weil am Rhein, Germany
- For filming, we used a GoPro Hero Black 13 in combination with the Crane M2 gimbal.
- For the photos, we used a Google Pixel 9.
- For the audio recordings, especially for the live segments, we used the Røde Wireless Go II together with the GoPro Media Mod.
- In post-production, we work with various Adobe Creative Cloud programs, including Photoshop, Premiere, and Illustrator.
Since we get this question again and again, we want to answer it right away:
From the initial idea to the actual production, the editing of the entire footage, and the creation of all videos (trick clip, mini tutorial, and detailed tutorial), as well as this blog post, we needed several full working days.